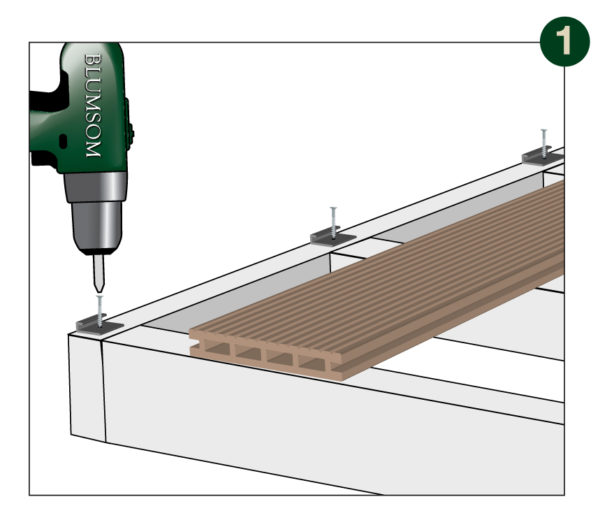
Step 1
Position and secure the BLUMSOM Clips along the outer side of the first joist with 300mm spacing.
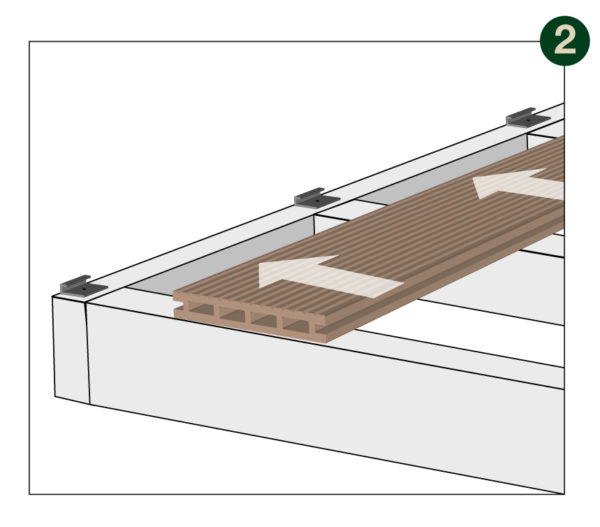
Step 2
Slot the first decking board into the hidden BLUMSOM Clips.
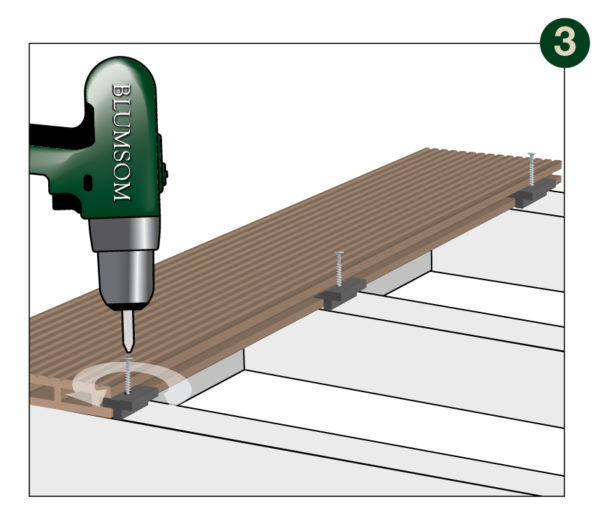
Step 3
To fix further decking boards, position BLUMSOM 6mm Fasteners into the grooved edge of the secured board and position the screw. (Do not tighten screw into the joist at this stage). Screw holes should be lined up with the joist. The flat face of the BLUMSOM 6mm Fastener should be facing up. Apply one hidden BLUMSOM 6mm Fastener on each joist along the length of the board.
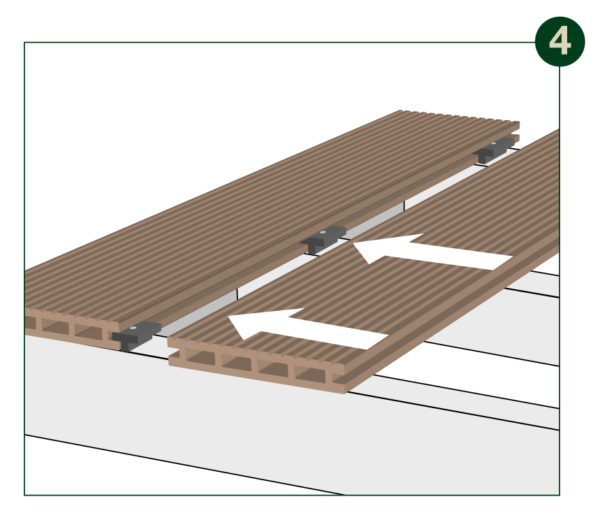
Step 4
Fit the next decking board onto the hidden BLUMSOM 6mm Fastener by slightly angling the decking board and slotting in. Butt joins, where the ends of two decking boards meet, this may require doubling up on supporting joists as you need to make sure each board is held in place with it’s own BLUMSOM Fastener (where they meet). Allow 6-8mm for length-ways expansion.
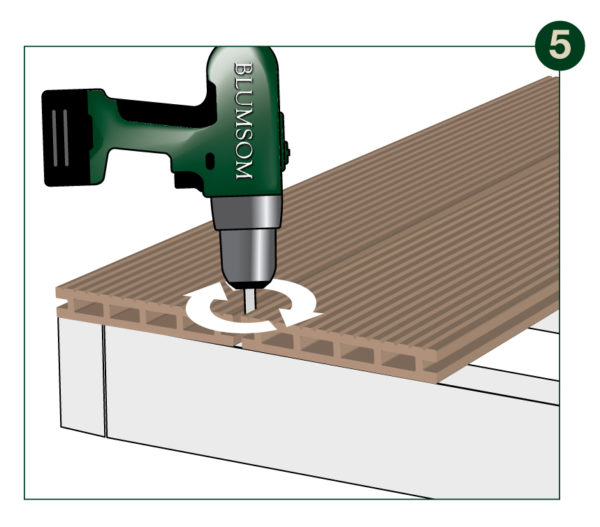
Step 5
Secure the hidden BLUMSOM 6mm fasteners, between the last boards, down onto the joists. Make sure the fixing BLUMSOM 6mm fastener is secure up against the groove.
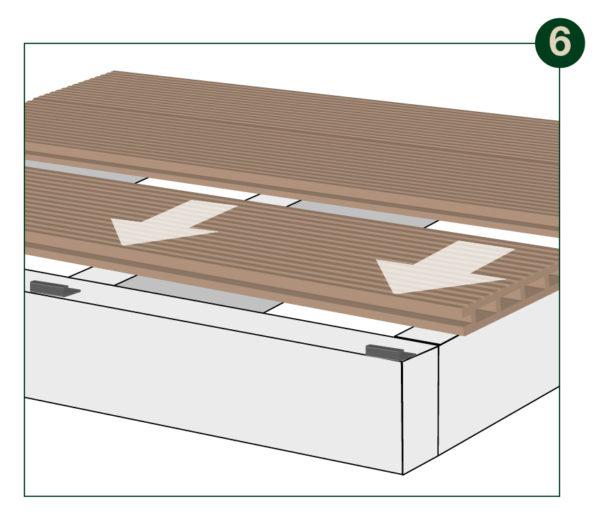
Step 6
Establish the full width of the last two decking boards. This is to include the 6mm gap between them which can be achieved by using the plastic spacer tab provided. Using the last joist, clearly mark where the outer edge of the last board is to be positioned. Apply the hidden BLUMSOM clips to the outside edge of the last board position. Fix the last (end) board to the BLUMSOM clips.
.
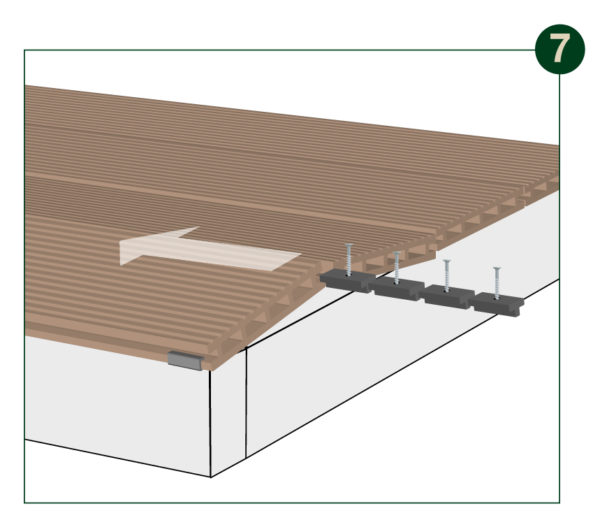
Step 7
Once the last (end) board is in place, insert the final decking board. Now the last two boards are in position, insert (slide) the number of hidden fasteners needed.
Secure the hidden fasteners to the joists between the gap of the last two boards.
.
